
- Published on
Automate your deployment with AWS CodePipeline - Part 2
- Authors

- Name
- Devin Reeks
Lets configure our IAM policies, roles and EC2 instance
Title: IAM policies, roles and EC2 instance
Author: Devin Reeks
Language: English
Security is important, particularly when using AWS products. Its extremely easy to become the target of a malicious attack if you don't take the necessary precautions and to rack up an unexpectedly large bill.
In this article we will setup our IAM policies and roles, and configure our EC2 instance with the necessary access.
feel free to give full admin permissions on a root user account, or more visually:

To recap moving parts from the previous article:

This is how the cloud components fit together:

The green ticked services are the ones we will cover in this part
Lets start with permissions:
IAM Policies & Roles
navigate to the IAM dashboard in the AWS console
It is in here where we create the role necessary for the EC2 to access the various services we will interact with. IAM allows you give full admin access to a service- or to drill down to the services and interactions with those services. It can be extremely granular. However, for the sake of this article, I will grant all permissions on the resources we are using.
To do this, we create a role:

As we are going to give this role to the EC2, select EC2. Clicking next will take you to the “Add permissions” screen. Its in here where we can select either an AWS manged policy (feel free to give full admin access, but do so cautiously, for spike testing purposes only) or for better practices to create a custom policy. In this custom policy I will give my EC2 access to:
- Amazon S3
- Amazon DocumentDB Elastic Clusters
- CodeDeploy
I will select all actions, however, feel free to lock it down further. Secure code is all about least permissions necessary to perform the task.
Add the policy to your role, give the role a meaningful name and description and then create it. Its from here we need to attach it to our EC2.
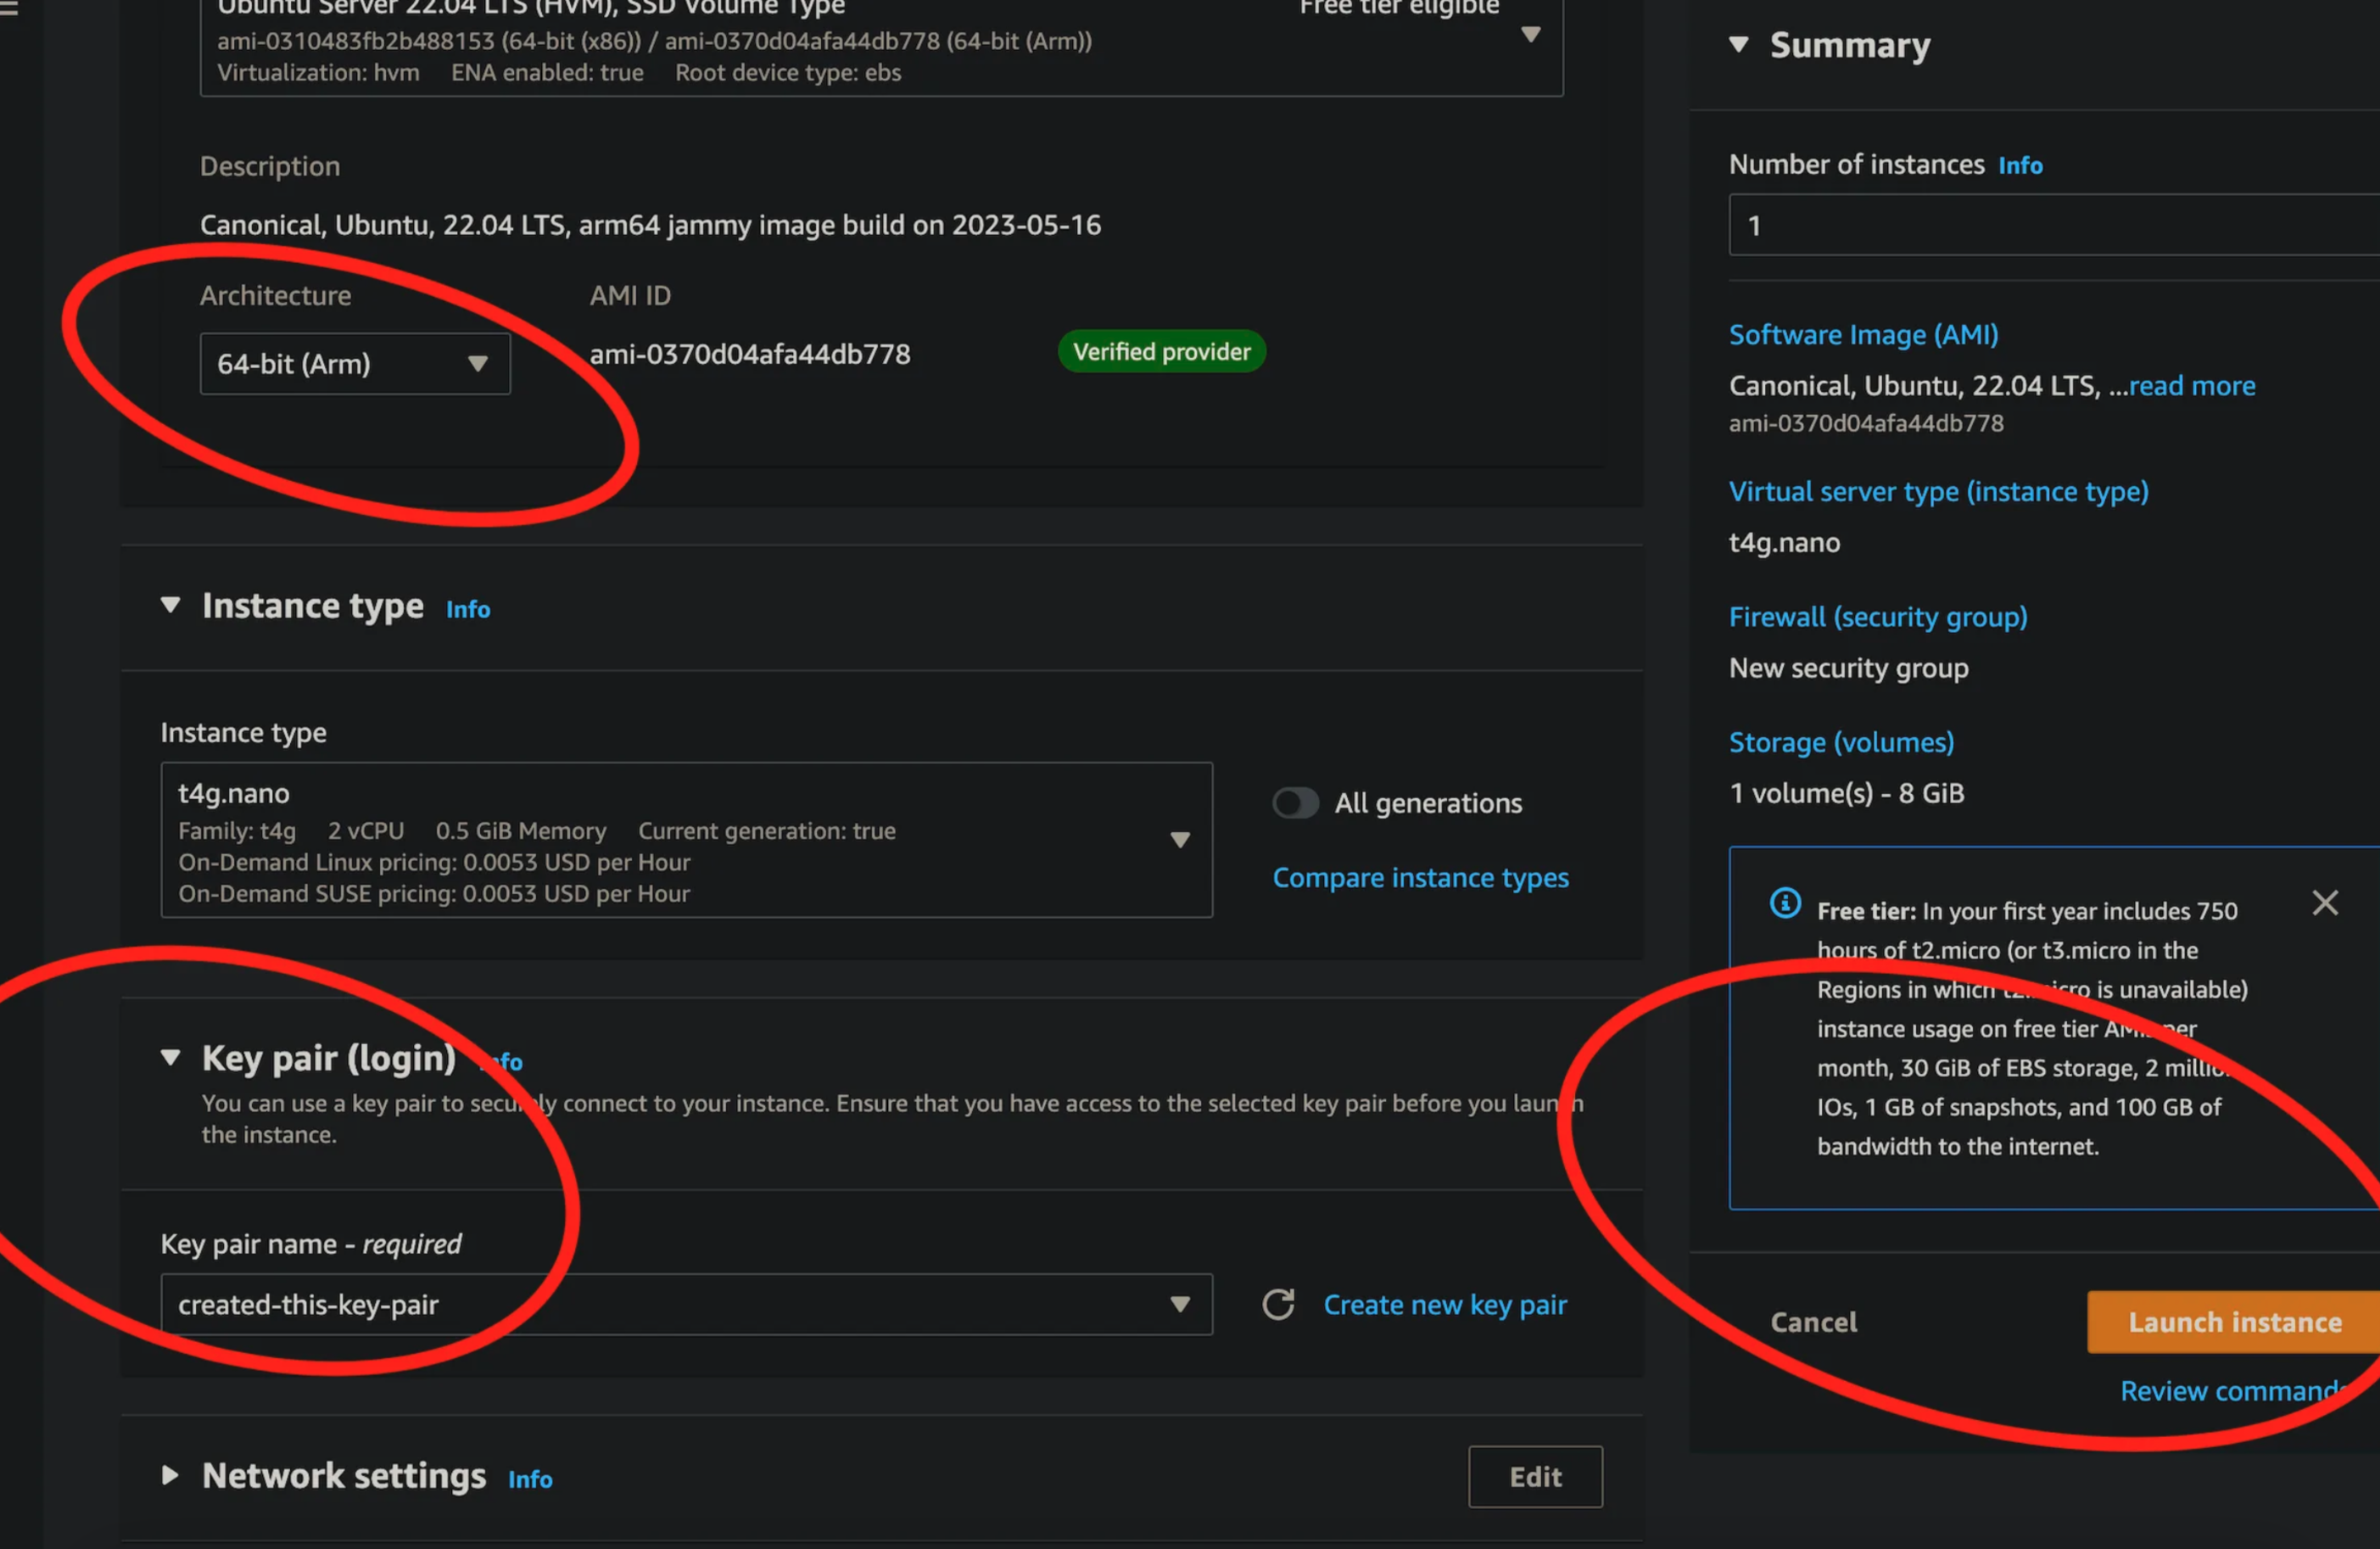
Lets provision an EC2 instance. I am going to go with the smallest one I can get, with an AMI of the latest Ubuntu distro (pick your poison) on arm architecture. The solutions architect informed me this was a more efficient option.
Create a new keypair login, create a security group too (should be the default) to allow ssh traffic (so you can ssh in to install the codedeploy agent). Then click “Launch Instance”.
If you navigate back to the EC2 running instances, you should see the instance you just provisioned. It may take a minute or two to start up. In the interim I recommend clicking “actions” and modifying the IAM role. It is here where we can attach the IAM role we created in the previous step. The EC2 does not need to be restarted for the role to take effect. However, please note that if CodeDeploy agent is running on the EC2, the agent will need to be restarted.
Connect to your instance & install codedeploy agent
Ssh into your instance by clicking the connect button. Use either the inbuilt browser console or AWS also give instructions in the same panel to ssh from your local console.
in ubuntu we do this by running (don’t forget to switch in the correct region (I’m from Australia so I use ap-southeast-2):
sudo su
apt update
apt install ruby wget
cd /tmp
wget https://aws-codedeploy-<region>.s3.amazonaws.com/latest/install
chmod +x ./install
./install auto
service codedeploy-agent start
systemctl enable codedeploy-agent
The above code gives your terminal sudo permissions, updates the package lists, installs ruby, opens tmp folder and installs the codedeploy agent. It then gives executable permissions to the install file and runs the agent and enables it to be run on boot.
run:
service codedeploy-agent status
to view the agents status. It should say something along the lines of:

We can now configure our pipeline, lets do so in the next part.